Running frequent and targeted crawls of your website is a key part of improving its technical health and improving rankings in organic search.
In this guide, you’ll learn how to crawl a website efficiently and effectively with Lumar.
The six steps to crawling a website include:
1. Understanding the domain structure
2. Configuring the URL sources
3. Running a test crawl
4. Adding crawl restrictions
5. Testing your changes
6. Running your crawl
Watch an overview of setting up a crawl in Lumar below, or read on for step-by-step instructions.
Step 1: Understanding the Domain Structure
Before starting a crawl, it’s a good idea to get a better understanding of your site’s domain structure:
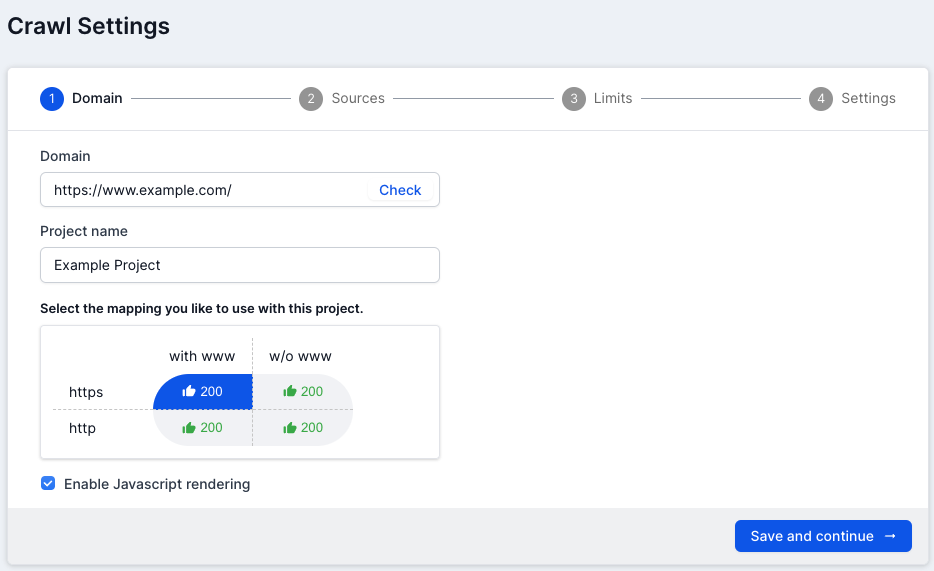
Check the www/non-www and http/https configuration of the domain when you add the domain.
You can also enable JavaScript rendering to analyze the rendered version of the pages on your site.
Step 2: Configuring the URL sources
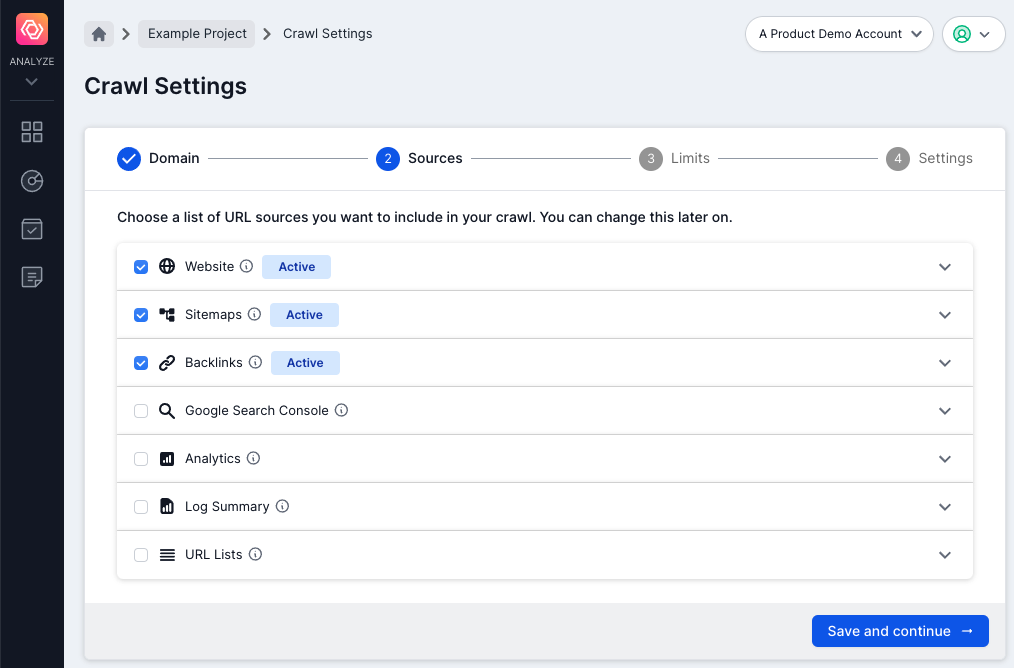
There are seven types of URL sources you can include in your Lumar projects. Consider running a crawl with as many URL sources as possible, to supplement your linked URLs with XML Sitemap and Google Analytics, and other data.
- Web crawl: Crawl only the site by following its links to deeper levels.
If you are not sure about sub-domains, check the ‘Crawl all sub-domains’ option and they will automatically be discovered if they are linked.
You can also choose to crawl both HTTP and HTTPS pages, to get visibility over pages served over a non-secure protocol.
- Sitemaps: Crawl a set of sitemaps, and the URLs in those sitemaps. Links on these pages will not be followed or crawled.
- Backlinks: Upload backlink source data, and crawl the URLs, to discover additional URLs with backlinks on your site. The backlink data will be available in various reports.
If our Majestic Integration is part of your package, use it to automatically bring in data such as backlink count and backlink domain count.
- Google Search Console: Use our Google Search Console integration to enrich your reports with data such as search impressions, positions on a page, devices used etc. and to discover additional pages on your site which may not be linked.
- Analytics: Similarly, you can use our Google Analytics or Adobe Analytics integration, or upload analytics source data to discover additional landing pages on your site which may not be linked. The analytics data will be available in various reports.
- Log Files: Upload log file summary data from log file analyzer tools, such as Splunk and Logz.io to get a view of how bots interact with your site. You also have the option to upload log file data manually.
- URL Lists: Crawl a fixed list of URLs. Links on these pages will not be followed or crawled.
Step 3: Running a Test Crawl
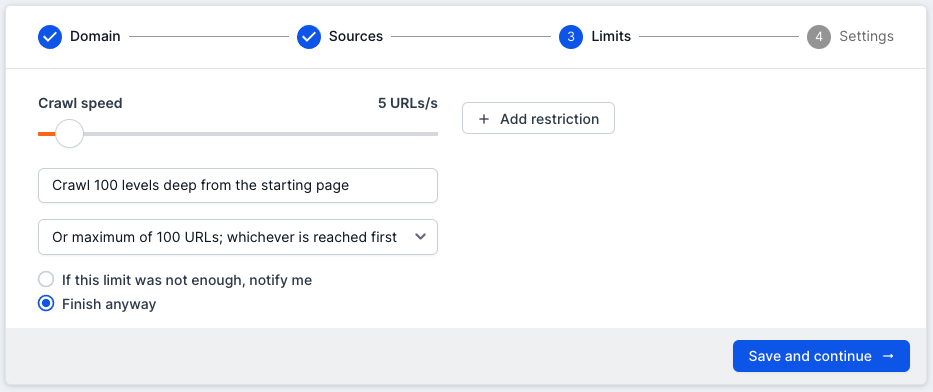
Start with a small ‘Web Crawl’ to look for signs that the site is uncrawlable.
Before starting the crawl, ensure that you have set the ‘Crawl Limit’ to a low quantity. This will make your first checks more efficient, as you won’t have to wait very long to see the results.
Problems to watch for include:
- A high number of URLs returning error codes, such as 401 access denied
- URLs returned that are not of the correct subdomain – check that the base domain is correct under “Project Settings”.
- Very low number of URLs found.
- A large number of failed URLs (502, 504, etc).
- A large number of canonicalized URLs.
- A large number of duplicate pages.
When you run the test crawl, also watch for performance issues caused by the crawler.
If you see connection errors, or multiple 502/503 type errors, you may need to reduce the crawl rate.

If you have a robust hosting solution, you may be able to crawl the site at a faster rate.
The crawl rate can be increased at times when the site load is reduced – 4 a.m. for example.
For more information about crawl troubleshooting, you can also refer to the article, How to Fix Your Failed Website Crawls.
Step 4: Adding Crawl Restrictions
One you’ve confirmed that your site is crawlable, you can launch your crawl.
Ideally, a website should be crawled in full (including every linked URL on the site). However, very large websites, or sites with many architectural problems, may not be able to be fully crawled immediately. It may be necessary to restrict the crawl to certain sections of the site, or limit specific URL patterns. Such restrictions can be added within the ‘Advanced Settings’ tab.
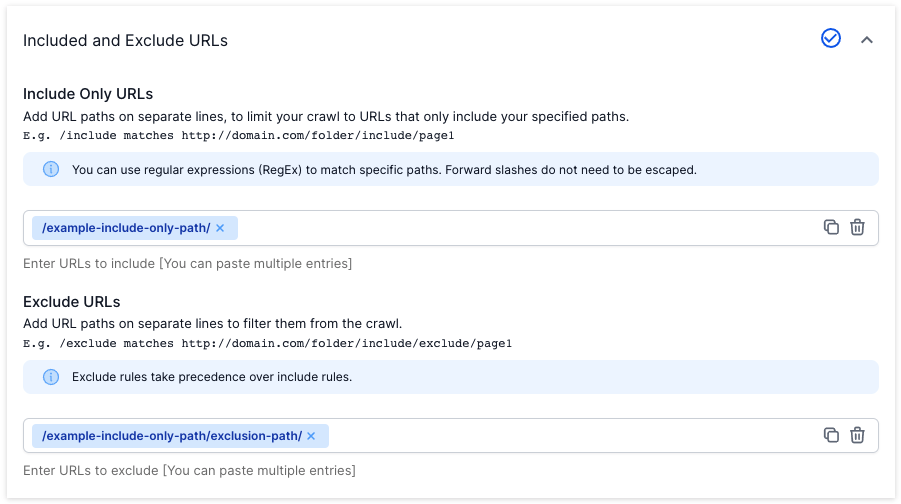
Filter URLs and URL Paths
Use the ‘Include/Exclude’ URL fields to limit the crawl to specific areas of interest.
Adding restrictions ensures you are not wasting time (or credits) crawling URLs that are not important to you.
Add Crawl Limits for Groups of Pages
Use the ‘Page Grouping’ feature, under ‘Advanced Settings’ to restrict the number of URLs crawled for groups of pages based on their URL patterns.
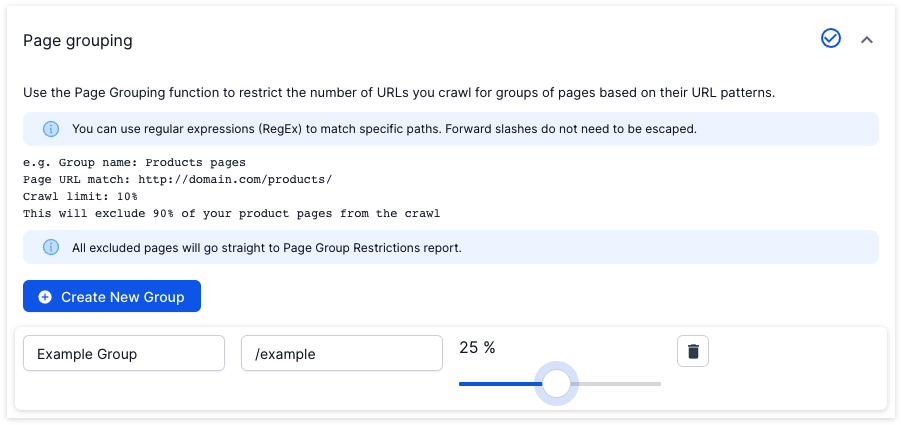
Here, you can create a new group and add a name.
In the ‘Page URL Match’ column you can add a regular expression.
Set the crawl limit percentage. For example, if you were crawling your product pages (e.g. /products) and set this to 10%, 90% of your product pages would be excluded from the crawl.
URLs matching the designated path are counted. When the limits have been reached, all further matching URLs go into the ‘Page Group Restrictions’ report and are not crawled.
Use Robots Overwrite Settings
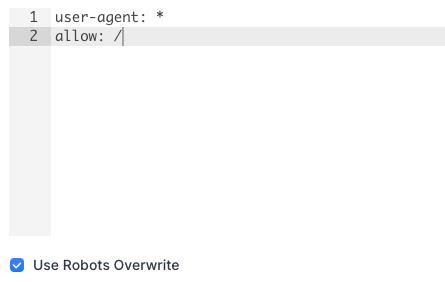
Lumar’s ‘Robots Overwrite’ feature allows you to identify additional URLs that can be excluded using a custom robots.txt file – allowing you to test the impact of pushing a new file to a live environment.
Upload the alternative version of your robots file under ‘Advanced Settings’ and select ‘Use Robots Overwrite’ when starting the crawl:
Remove Parameters
If you have excluded any parameters from search engine crawls with URL parameter tools like Google Search Console, enter these in ‘Remove URL Parameters’ under ‘Advanced Settings’.

Step 5: Testing Your Changes
Run one more test crawl to ensure your configuration is correct and you’re ready to run a full crawl.
Step 6: Running your Crawl
Ensure you’ve increased the ‘Crawl Limit’ before running a more in-depth crawl.
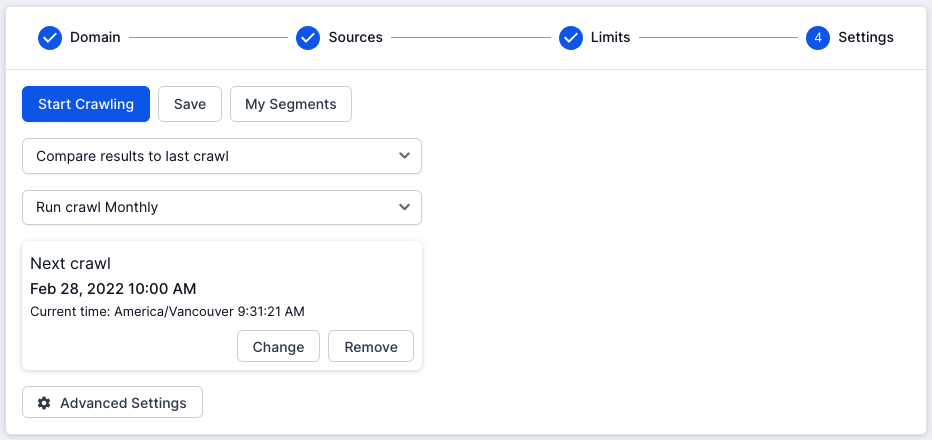
Set ‘Scheduling’ for your crawls to track your progress. Click in the ‘Schedule crawl (optional)’ field and choose the crawl frequency. You’ll then be able to choose the date and time of your first crawl.
Handy Tips
Settings for Specific Requirements
If you have a test/sandbox site you can run a ‘Comparison Crawl’ by adding your test site domain and authentication details in ‘Advanced Settings’ (see the ‘Test Site Domain and Custom DNS’ option).
For more about the Test vs Live feature, check out our guide to Comparing a Test Website to a Live Website.
To crawl an AJAX-style website, with an escaped fragment solution, use the ‘URL Rewriting’ function in ‘Advanced Settings’ to modify all linked URLs to the escaped fragment format.
Analyze Outbound Links
Sites with a large quantity of external links may want to ensure that users are not directed to dead links.
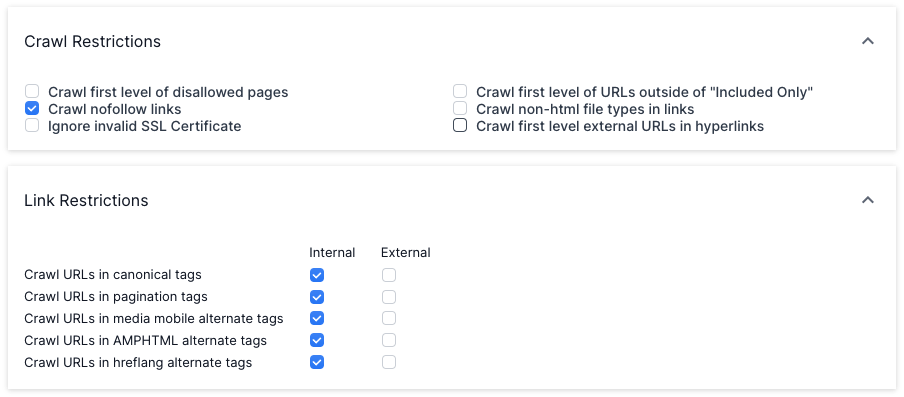
To check this, take a look at ‘Crawl Restrictions and ‘Link Restrictions’ under ‘Advanced Settings’. This will add an HTTP status code next to external links within your report.
Change User Agent
See your site through a variety of crawlers’ eyes (Googlebot, Googlebot Smartphone, etc.) by changing the ‘User Agent’ in ‘Advanced Settings’.
Add a custom user agent to determine how your website responds.

Remember, the more you experiment and crawl, the closer you get to becoming an expert crawler.
